Categories
3D modeling 3d printing FLOSS

Lithophane creator for 3d printing

I wrote an OpenSCAD script to make it easier to create a lithophane for the 3d printer. There are a lot of lithophane models of photos to be found on Printables, a community hub for 3d printing, but none that I could find offered the possibility to easily add your own photo to the model. Luckily OpenSCAD has a Customizer. The Customizer provides an easy to use graphical user interface (GUI) to change an existing model in OpenSCAD. It is therefore not necessary for the user to change the code.

Example of a lithophane created in OpenSCAD

The small OpenSCAD script revolves around the Surface() command. This command reads heightmap information from text or image files. Alpha channel information of the image is ignored and the height for the pixel is determined by converting the color value to grayscale. The invert boolean parameter inverts the color value of the image if set to true. Below is the module that handles the Surface() command and determines the thickness of the model.

module place_image(img,th,inv) {
        //import the image and scale it to the desired height and width and adjust the thickness.
        scale([1, 1, th])
        surface(file = img, invert = inv, convexity=3, center=true);
}

The script, example photos and an example stl file can be found on Printables here: https://www.printables.com/model/293702-lithophane-creator.

The lithophane model can be created in five steps described below.

  1. Download OpenSCAD. For this your need the free and open source program OpenSCAD which is available for OSX, Windows and Linux. Start OpenSCAD and load the .scad file available here together with the sample negatives photos below. Easiest is to have the .scad file and the negatives in the same folder or map. Now use the Customizer to create you .stl file. 
  2. Make a negative of your photo. If you start with a jpg file you need to convert it to a png file first. Before loading your png file into OpenSCAD you need to make a negative of the photo first. There are many ways to do this but I use Imagemagick, a command line tool for Linux, Windows, Mac OSX, and others. To create a negative file type: convert -negate foo.png inverted_foo.png on the command line.  To create a negative png file and reduce it 20 percent type: convert -negate -resize 20% foo.jpeg inverted_foo.png. (If you rather use a GUI instead of the command line you can also use GIMP, yet another free and open source program. Download GIMP for OSX, Windows or Linux. Open the original photo. Next select Colors and then Invert in the menu.)
  3. Use the Customizer. The Customizer has the option to change the background. This is important to select. If the background of your original photo is mostly white or lightly coloured choose ‘light’. If it’s mostly dark choose ‘dark’. In addition enter the height and width in pixels of your photo.
  4. Render and save the .stl file. To create an .stl press F6 or select Design/Render in the menu. It’s important to know that rendering takes longer when the image is larger. I found that a a 200×200 pixels photo takes a few minutes to render. Since the resolution of the 3d printer is limited it’s probably needless to go beyond 40.000 pixels.
  5. Slice and print. Make sure that the photo is placed in the upright position as shown in one of my photos on Printables (see link above).

The script in this blog post provides a flat model of a photo. If you want to have a curved model take a look at this blog post of mine: https://homehack.nl/a-curved-3d-printed-lithophane-in-openscad/

Categories
open source social

To improve Funkwhale

I’ve been following Funkwhale for a while now and have written earlier about the project. Before I start I want to make clear that I love Funkwhale and I’m thankful to the developers and other contributors that have made it awesome. Lately however it has become obvious to me that the project could get more traction if the social interaction between users would be improved. Currently a user can do little to interact with an artist or other users. Also the interface can be confusing for people that are new to Funkwhale. It’s therefore that I’ve come up with some tips for the developers to tweak Funkwhale to provide the user a better experience.

But first what is Funkwhale. If you already know you can skip this paragraph and the next. Funkwhale lets you listen and share music and audio within a decentralized, open network. So you can upload your music library and share it with friends and family. Music from the public domain or with a Creative Commons license can be shared with all Funkwhale users. Funkwhale currently consists of 53 known servers (called pods in Funkwhale) which can communicate together using standard, free and open source technology. Funkwhale uses the ActivityPub protocol that is often used in the Fediverse, an ensemble of federated servers.

Funkwhale is both for people that create music or podcast and people that just like to listen to it. You can join an existing pod or create your own pod. The last option provides the most control over your music or podcasts. Other than Soundcloud or Bandcamp, Funkwhale is not owned by a central organization. Instead it’s a federation of pods from different owners that share music and podcasts.

Currently the user can explore and listen to music that is uploaded by others. Basic functions like adding to favourites, adding to a playlist or downloading are in place but discoverability and social functions are either non-existing or poorly implemented.

Discoverability. I would love to see a Trending tab in the Explore section. This Trending tab could contain a list of songs that are favoured the most e.g in the last month and a list of songs that are listened to the most in that same period.

Social interaction. Furthermore it would be nice to be able to see number of ‘streams’ per song or the number of times a song is favoured. Maybe further down the line could be the ability to comment on a song although I’m aware of the moderation problems that may cause.

Interface. The interface of Funkwhale is confusing at first. It took me a while to make sense of it with terms like channels, libraries, playlists and radios. Sure they all sound familiar but the intricacies were lost to me in the beginning. I wish I had read the user manual of Funkwhale sooner but I suppose many users just don’t read manuals. Anyway channels are a collection of audio files published directly on Funkwhale. While libraries are used to store collections of music such as your personal music collection or a collection of publicly available music. So a channel would be more for an artist to publish his or her own creations while libraries is for uploading work from others. Playlist have more or less the same function that they have on other music services. A user can create one, add or delete selected songs etc to a queue. Radios on the other hand enable the user to create a queue of music by a range of user defined parameters called filters (a pretty cool feature if you ask me). In addition the interface of Funkwhale has a great number of inconsistencies. To name just one when I open the queue I’m unable to favourite or get more information about any queued song. To conclude this part, the interface of Funkwhale offers a lot of great options but needs to be made more consistent and simplified for the user.

Funkwhale has so much potential and it’s, as far as I know, the only software out there that allows musicians and music listeners to share music and socially interact at the same time in a network without the burden of a centralized network where one organization tells you what you can and cannot do. The Funkwhale project is young and in its infancy so I’m convinced that it will improve over time and that the issues that I mentioned will be addressed. In the mean time I’ll enjoy using Funkwhale when listening to my own library of music, explore what music other have uploaded or just listen to my favourite podcast.

Some useful links for Funkwhale:

Categories
Linux open source PC

Peeling the onion

About five years ago I got interested in free and open source software (FLOSS) and online privacy in general. The problem was that almost all software that I used at that time was proprietary. I had an iMac with OSX and besides that I worked a lot with Google apps (Gmail, Blogger and Google Docs most notably). From that point it felt as pretty daunting task to switch completely to FLOSS. Where to start? Just installing Linux on my iMac seemed far to large a step. How to migrate all my documents and learn to work with a OS and all these apps that were new to me. Instead I decided a to gradually replace my apps with FLOSS alternatives until I finally reached a point where I could easily replace the OSX operating system with Linux.

I started with the low hanging fruit and the lowest hanging of them all is the web browser. So Chrome was replaced by Firefox. Next was the mail client so I replaced Mail with Thunderbird. At that time I started to work with graphical applications so I chose Inkscape, GIMP and for my 3D CAD work Solvespace, FreeCAD and OpenSCAD. I installed these apps on my iMac still running OSX and took my time to get familiar with them.

For my simple video editing tasks I kept lazily working with iMovie for a long time. I tried OpenShot but it kept crashing but after I while I discovered Shotcut which I found a better replacement. More recently I discovered Avidemux which is simple and works on lightweight systems. Next was Darktable instead of Photos to organize the thousands of photos that I have.

To replace Google proved to be even more difficult. Google is everywhere. The easiest one is Google Search. I first replaced it with DuckDuckGo. DDG is not FLOSS but at least it’s not Google. Currently I’m experimenting with MetaGer which is free and open source software. Google Maps was replaced by Openstreetmap and to upload my content I exchanged YouTube for PeerTube. This was all pretty simple. Next was Google Drive and this proved to be more difficult. I figured the best was to replace Google Drive with NextCloud. But instead of having someone else running NextCloud for me I found it appealing to have my own server. But I don’t know anything about installing and maintaining a server. Then someone mentioned Yunohost to me. Yunohost is an operating system that allows an idiot like me to setup and manage a server in a very simple way. Installing it went flawless and installing NextCloud on top of Yunohost encompassed little more than a few mouse clicks. After this I could say bye bye to Google Docs.

In the mean time I felt confident enough to replace OSX with Linux. With all the preparation that I had done it was an almost painless transition. I downloaded a Linux distro, put on a USB drive and installed it on a PC (not the iMac). Next I could install all the FLOSS apps that I was already familiar with and I was up and running in no time.

I’d like to call this method Peeling the Onion. Where the onion is the problem. Remove the outer most peel first and working my way to the inside. I work pretty much exclusively with FLOSS now and I couldn’t be happier with the result. I feel more in control of the software and and my data which is a very satisfying experience. Yes, some of the software is little bit rough around the edges and not as smooth as some of the proprietary software I was used to but I feel that I’m at the helm of my PC without a giant cooperation driving me into a direction that I don’t want.

Categories
open source

Your music library and MusicBrainz Picard

With all the steaming services available why have your own digital music library? The reason for this is two-fold. First streaming services like Spotify or Deezer have a constant changing library of music as a consequence of the agreements that they make with rights holders. This means that music in your playlist can suddenly disappear (or being greyed out) or, what happened to me, explicit songs are being replaced by clean ones. The latter can cripple them to a point that they aren’t listenable any more. What the examples demonstrate is that eventually you have limited control over the music of these services. Secondly the service itself can change e.g the app that you’re relying on disappears as happens with the Spotify app on my Squeezebox network music player.

Alternatively you can build your own digital music library e.g from your CD collection. This is called ripping and is done with software such as the free and open source Asunder. Asunder creates nice digital music files in the audio coding format that you desire. It can even add metadata to the file by checking an external music database. The process of adding or changing metadata is called tagging. The result of this process is often incomplete and results to gaps in the music collection. This is where MusicBrainz Picard comes in. It’s a tag editor that can fill all these gaps and it’s pretty good at it.

To work with MusicBrainz Picard open a music file, a folder with music files or even multiple folders with music files. MusicBrainz either gets the missing metadata by comparing it with it’s own. If that fails MusicBrainz Picard can get the correct metadata with acoustic fingerprinting. This compares part of a song with their huge online database of MusicBrainz to find the right song and add the correct metadata. After everything is done just save the info to the music files and your done.

Another powerful option of Picard is to organize your all your digital music file. To do this just select all the music and drag it into Picard. This video https://yewtu.be/watch?v=02fWYIur42g demonstrates just how powerful this option is (alternatively you can also watch the video here: https://www.youtube.com/watch?v=02fWYIur42g).

MusicBrainz Picard and the MusicBrainz database are projects of the MetaBrainz Foundation. MetaBrainz Foundation has a philosophy of free, open access of data. It has been set up to build community maintained databases and make them available in the public domain or under Creative Commons licenses. Most contributions come from volunteers so users are encouraged either to donate or contribute to the data gathering process.

Categories
3D modeling 3d printing open source

My videos remastered on PeerTube

I wrote earlier about my move from YouTube versus PeerTube. My new videos will appear on both platforms but I’m also remastering my old Solvespace videos. These videos were all 720p which isn’t ideal for a tutorial. Having most of the material of the videos available I’m recreating them in 1080p. When I’m done I’ll only upload these HD videos to PeerTube. The videos take a lot of time to create and I’m currently very busy so the videos appear irregularly but whenever I have time I’ll make them.

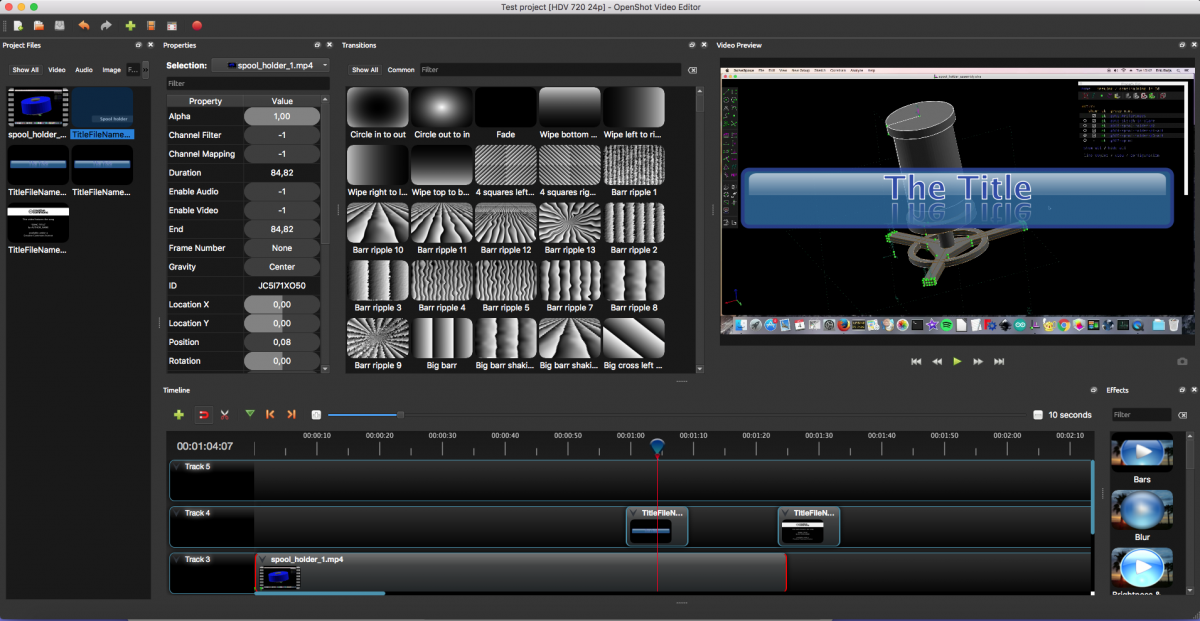
The latest video that I remastered is about the Geneva Drive. A wonderful project to design and 3d print. I redid part of the screen recording because either the original was gone or wasn’t good enough. For this video I used the latest version of OpenShot (v2.5.0) but I’m unfortunately still having issues with this video editor. For the next video I’ll return to Shotcut which is currently my favourite free and open source editor. Here is a link to the video if you want to see it on PeerTube.

When I tried to embed a PeerTube video here I found that the WordPress embed block is not suitable for this purpose. Apparently PeerTube is not (yet) whitelisted by WordPress. Also it appears that iframe tags, my other option, are blocked by WordPress because of security reasons. That’s a bummer.

Categories
open source social

YouTube or PeerTube, which will it be.

What’s wrong with YouTube

If you want to watch a video chances are you’ll end up on YT. Sure there are alternatives such as Vimeo or Dailymotion but they are tiny compared to YT. Therefore YT has a near-monopoly. As you know monopolies are bad. YT can do whatever they want and users will have to accept it no matter what. Frequently I’ve seen YouTubers ranting in on their YT channel about YT because of some wrongdoing from YT but they have no where else to go (or at least that’s what they think).

YouTube collects our data and sells it. You may think that YT is free but it’s not. Users pay by providing YT with data about their behaviour on YT. This data is turned into profiles about the users and sold to third parties. These third parties can then target you for their ads.

YouTube advertisements are getting increasingly annoying. Alphabet, the holding company, wants to make YT as profitable as possible to satisfy the shareholders. This can either by offering paid premium services or (targeted) ads. Lately I noticed a sharp increase in ads and I’m confident that this will only increase further in the future.

YouTube algorithm wants to keep me on YouTube. Why? So that they sell more ads. The secret of YT is the algorithm that recommends new videos. These recommendations are based on my profile, increasing the chances that I lazily click on another video and another one. This often leaves me with a feeling of pointlessly watching videos while I should have done more productive things.

YouTube algorithm encourages controversy. Controversial videos ensures ensure views and interaction such as likes, dislikes and comments. This in turn means again the opportunity to show more ads which means more income for YT.

What are the alternatives

Vimeo is the only sizeable competitor of YT. It’s business model differs because it doesn’t show ads, instead users can pay for more premium services. Vimeo does track the users however in order to show you ads elsewhere on the web. Also with the users consent Vimeo will sell your data to third parties. Lastly Vimeo is neither open source nor is it a distributed service.

Luckily more ethical alternatives are emerging. PeerTube is one of these alternatives. PeerTube is free and open source software and it’s a decentralized video platform that uses peer to peer technology. Instead of one single organization that controls all the PeerTube servers, all servers are controlled by different owners. Nevertheless PeerTube operates as one where videos on one server can be searched for and watched on another, thus creating a network of interconnected nodes.

Everyone can install PeerTube on a server (instance) and join the network (this is called federation). Already hundreds of instances exist. Every owner or administrator of an instance can determine which other instances it follows.

Everyone can watch videos on PeerTube but if you want to comment or like or upload your own content you must join PeerTube. To join PeerTube it’s important to understand that there is no centralized portal to login. Instead you’ll choose an instance that you want to join, you login and enter the PeerTube network from that instance. This means that choosing the right instance is important. Each instance provides useful information about itself but an overall list can be found here.

PeerTube has another great feature. The PeerTube instances do not only federate with other PeerTube instances, they also federate with a larger network that’s called the Fediverse. Mastodon, a social network, is one of these members of the Fediverse and it has a huge number of users. Videos can easily be shared on Mastodon and Mastodon users can comment on videos with their Mastodon account.

Having read this it’s probably not a surprise to you that I’m currently transferring my content from YouTube to PeerTube and remaster the old videos in the process. I also intend to create original content and share it solely on PeerTube. It’s a drop in the ocean and no one at YouTube will loose any sleep over it but that doesn’t matter. PeerTube is still young (2015) and the developer Framasoft is working hard to improve PeerTube. Already some free and open source companies such as Krita, OpenStreetMap and KDE have a channel on PeerTube.

I do hope that people, that love their privacy and want to control their content, will follow me and start uploading great content to PeerTube for this is the only way to get out of the YouTube stranglehold. To get you started I’ve made a list of some useful links. See you on PeerTube.

Categories
open source PC

Giving OpenShot another try

I’ve been using iMovie for ages to create videos, both to document my family life and for my YouTube channel. Over the years I’ve create dozens of movies with iMovie and I kind of liked the simplicity of the program. I only wished it was free and open source software instead of proprietary.

The last couple of years I tried several free and open source alternatives notably OpenShot and Shotcut (both GPL v3 license). I was willing to jump to one of them but they were both rather unstable on my OSX system. OpenShot was the worst and crashed every few minutes making it impossible to work with. So in the end I kept using iMovie.

Recently I updated OSX to Sierra (10.12) and when I opened iMovie I noticed that everything worked except that I couldn’t render anymore. This is a disaster. All my carefully crafted movies are locked in iMovie and I’m unable to get them out of it. I really wanted to kick someone at Apple for this.

Since I couldn’t find a solution (apparently a widespread problem as I read on the web) I had no other alternative than to install OpenShot again (version 2.4.4). I didn’t have high hopes but to my surprise it was stable. I worked several days with it and it didn’t crashed once.

What I like about OpenShot is that it’s, like iMovie, very easy to use. The interface looks modern and unlike some other video-editing programs I could easily find my way around. The word intuitive springs to mind. This may give the impression that OpenShot is a very basic video-editor. OpenShot certainly can’t compete with the feature-rich major video-editors in the market but I was surprised that all basic features are included and there is more under the hood. To name just a few, the interface can easily be changed to my liking, the handling of titles is great and OpenShot enables the user to create animation which is handy.

It also offers a lot of control over the export of a video with every format, codec and quality setting available. This is probably because the video backend of OpenShot is linked to FFmpeg, IMHO the best video-converter around. (I wrote about FFmpeg earlier)

The coming weeks I will do further tests and will decide if this is my new go to video-editor. A bonus is that OpenShot is available for Linux, Windows and OSX so I can also use it on my Linux desktop.

UPDATE : 12 December 2019. After having done some projects I’ve noticed an issue with OpenShot. OpenShot tends to be very resource hungry in both memory and cpu load. This creates problems in more complex projects where the program becomes very slow. This forces me to restart OpenShot and continue. Also on my humble 2011 iMac it’s impossible to get smooth video and sound in the preview window.

UPDATE: 26 Februari 2020. I updated to version 2.5.0 (from 2.4) and it appears that this latest version is a little less resource hungry. With more complex projects with multiple sound tracks mixed I still experience stuttering in sound which is annoying when trying to edit the video. This could however be due to the 2011 iMac that I’m currently working on.

Categories
Linux open source Raspberry Pi

Maintaining the Raspberry Pi Squeezebox server (aka Logitech Media Server)

I wrote earlier about the Logitech Media Server (LMS), open source software that I’ve used to turn a Raspberry Pi into a music server for my Squeezebox devices. I’m using my Raspberry Pi based Logitech Media Server a couple of months and I’ve grown very fond of it. What started as an experiment now has become a device I’m starting to rely on. I guess that eventually I have to replace the USB-HDD that I connected to the Raspberry Pi with a better one. In the meantime however I do need to maintain the LMS. In this blogpost I’ll explain how I add and remove music files from the LMS and create a simple backup of your music files. Finally I provide a tip to debug problems with the Logitech Media Server. All software that I used for this project is free and open source.

Adding, changing and deleting music files

When I buy a new CD I want to add it to my LMS. All the ripping is done using Asunder, a low resource ripper for Linux. Asunder has a simple interface but it has many options can encode to many different formats. It can also tag the files using CDDB but I use MusicBrainz Picard because does a much better job when it comes to tagging (in addition MusicBrainz can organize your digital music library). The tagger completes the metadata on the music files which is very convenient when uploading the files to the LMS. A simple example is that album art is added to the file.

Now about moving the encoded files to the LMS. At first I unmounted the USB hard disk from the LMS, removed it and connected it to the laptop and copied the albums. For adding new albums this proved to be be a clumsy method and I quickly found myself looking for an alternative.

I decided to use FTP to transfer files over the network to the Raspberry Pi. FTP is a network protocol to transfer files between a client and a server. The software that I’m using is either FileZilla or gFTP. They have basically the same functionality but gFTP is not available for Windows while FileZilla is available for GNU/Linux, OSX and Windows. Working with both is easy enough.

Later I also used the scp command (Linux, OSX) in the terminal and simply copy the music files on my PC to the music folder on my Raspberry Pi powered LMS.

Read this if you (like me) run into problems with file ownership on your Raspberry Pi. In the past I couldn’t set the ownership for the USB hard disk on the Raspberry Pi. Only root was able to write to the disk. The reason is a bit technical and maybe confusing but I had used the Windows FAT filesystem for the USB hard disk and when I mounted it on my Linux laptop (Puppy Linux distribution), ownership of all files was changed by Puppy Linux to root. At this point it was impossible to change ownership and permissions with chmod and chown from the media server. To solve this problem I had to first unmount and mount the USB hard disk. To mount the hard disk use the following general command is used:

mount device mount-point -o uid=foo -o gid=foo

or in my specific case

sudo umount ~/media/usb-drive

and then mount

sudo mount /dev/sda1 ~/media/usb-drive -o uid=pi -o gid=pi

This command sets the ownership of all files on the USB hard disk to pi instead of root enabling me to use FileZilla and gFTP to copy files from a remote PC to the Raspberry Pi.

Adding Podcasts to the server

Podcasts can be easily added to the Logitech Media Server and there is no need to subscribe to a service. First the Podcasts app must be added to myApps on the Squeezebox player or players. Next to add podcasts to the list a plugin needs to be installed. To do this open the web interface in your browser and type:

<your_Raspberry_Pi_ip_address:9000> (in my case 192.168.178.69:9000)

Choose Settings at the bottom right of the web browser and then choose the Plugins tab. Now enable the Podcasts (v2.0) plugin and reboot the Raspberry Pi for the changes to take effect. The Podcasts plugin is now active and can be entered through a new tab in the Settings menu. In this tab new feeds can be entered that will immediatly be available on the Squeezebox players. To find a certain feed look for the rss feed of your favorite podcast and copy the link into ‘add a new feed’ in the podcast tab of the Settings menu mentioned above (e.g. http://feed.thisamericanlife.org/talpodcast for This American Life).

Creating a backup of the music collection

I invested a lot of time in ripping my CD collection so it would be a shame if I lost my music files due to a hard disk crash. I therefore use a very simple backup method, largely copied from the Raspberrypi.org website to ensure that my files are safe. First make sure that there’s enough harddisk space available with df -h. Next do:

tar -cvf backup.tar.gz ~/media/usb-drive

This creates a file ‘backup.tar.gz’ that contains files in /media/usb-drive, the mounting point of my USB drive and places it in the same map. Next I use (again) Filezilla to move the backup file to my desktop computer. Alternatively the ripped files on the PC they were ripped on can serve as a backup.

Debug problems with the Logitech Media Server

I didn’t encounter much problems with the LMS but if you do take a look into the log file of the server. This can be done opening a terminal on your PC and login into the Rasperry Pi with:

ssh pi@<your_network_ip_address_of_the_server>
cat /var/log/squeezeboxserver/server.log

The sudo ssh command prompts for the password of the Raspberry Pi. Now look for anything suspicious in the log, copy it and do an internet search with your preferred search engine. Chances are someone already encountered the same problem.

Categories
open source social

FLOSS tools to create a forum or community

Introduction

With the demise of G+ a lot of community owners are suddenly looking for a new home. Since a lot of G+ users despise FaceBook (and rightfully so) other social networks are mentioned. The problem with a lot of these networks is that they are centralized and proprietary making the users depending on the whims of the owner of the network. Below I summerize the FLOSS options for people interested in setting up a community. This is not an exhaustive list. I encountered these options after discussions often on G+ and I experimented with some of these options during the last couple of months.

Self-hosted or not

An important decisions is whether or not to host the forum or community yourself. If you want to host it yourself you’ll keep full control of the server however the maintenance is considerably more labor-intensive than with a non-selfhosted solution. You also need to install the software on a server and configure it.

Friendica (self-hosting possible)

Both are macroblogging social media networks that offer the possibility to create a forum. The UI of Friendica doesn’t look very modern but the functionality needed to use and maintain a forum is all there. Click this link to see an example of what a Friendica forum looks like. If you want to create a forum on a existing server please note that the administrator of this server can place limits to the forum e.g the number of participant or the number of forums that can be created by one account. Be aware that you’re a guest on someone else’s server.

A practical example. In the German town of Zwenkau the citizens are provided with a community platform, the Zwenkauer Flaschenpost, for online communication and discussion between citizens. This is all done with a standard Friendica install on a server. If you want to read more here is a link.

Movim (self-hosting possible)

Movim is social platform that let you share and chat. Movim is build on top of the XMPP communication protocol. A strength of Movim is that is federates and that everyone with a XMPP account (e.g Jabber) can connect. Once you’ve created an account it’s very easy to create a community. The UI looks modern but some community admin features are missing (or I couldn’t find them). As an example as an owner I couldn’t ban someone from the community. On the other hand I found Movim community the easiest to set up (in a non-selfhosted environment). This is a link to my Movim community. Also a word of warning if you create a forum on an existing server be aware that you’re a guest of that server and that restriction may be applicable.

I recently wrote a more lengthy post about the chat capabilities of Movim.

Mastodon (self-hosting possible)

Mastodon is a microblog social network that has a TweetDeck like interface. I was hesitant to add it to this list because the UI and the dynamic experience differ from a classical forum where the same post remains in the viewport for days or weeks. However when joining the right instance (=server) or create one yourself it may very well become a great dedicated community. Here is a link to mastodon.art an instance where artists can show their artwork.

Flarum (only self-hosting)

Open source forum software that is currently in beta. Nice, modern UI. I’ve read some concerns about the beta status and the stability of Flarum. If you want to see what the interface looks like here is a link. Here is a link to a guide how to install Flarum.

NodeBB (self-hosting possible)

Open source forum software with a modern UI. You can either self host for free or use a NodeBB hosting plan that comes with a price tag. Here is a link to the source of NodeBB. You can check the interface yourself on this website.

phpBB (self-hosting possible)

Forum software based on the PHP programming language. I know phpBB mainly because it’s used on the FreeCAD forum, a place that I visit sometimes. phpBB is feature rich and from a user perspective it’s a joy to use. The documentation about this forum software can be found here. Here is a link to the source code.

Discourse (self-hosting possible)

Discourse discussion management software with a modern UI. It can either be self-hosted or Discourse can host for you. The latter which is clearly the business model of Discourse comes at price tag. If you want to see what Discourse looks like take a look at the discussion forum of Diaspora*or Tom’s 3D community. Here is a link to the source code and another to the install guide.

Last updated: 02 November 2021

Categories
open source social

Diaspora*, an alternative social network for GooglePlus

Why an alternative social network

Three weeks ago I wrote an article about the demise of G+ and I defined four criteria for an alternative social network. Based on these criteria I choose three social networks, Mastodon, MeWe and Diaspora* and signed up on them and promised to write about my experience with these three.

I will not write any further about MeWe since I already deleted the account after one week and wrote a post about it. So that leaves Mastodon and Diaspora*. This blog post is about my experience with Diaspora*.

Screenshot of the Diaspora* interface. Not flashy but very functional and fast.

What is Diaspora*

The shortest way to describe Diaspora* is it being a Facebook clone however this doesn’t do justice to Diaspora*. Although the user interface of Diaspora* has similarities with Facebook the network couldn’t be more different, kind of an anti-Facebook. First of all Diaspora* is free and open source software while Facebook is proprietary and Diaspora* is distributed while Facebook is centralized. The latter means that while Facebook is owned by a single entity that controls the entire network and it’s users Diaspora* has no owner and thus can never be controlled by a single organization or person. Instead Diaspora* consists of many servers (or pods) that have their own administrator. These servers are are all interconnected (or federated). Without going into details about how this works exactly being distributed has other notable advantages from a user point of view.

  • First of all Diaspora* doesn’t have ads  (it worth to note that some centralized social networks like G+ and MeWe also don’t have ads).
  • Diaspora* can’t be closed or sold.
  • There is no ‘built-in’ data-mining. While it can’t be excluded that some rogue administrator will use your data there is no ‘Diaspora* business model’ that would encourage this. Meaning that your privacy is better protected.

Working with Diaspora*

Being a user of G+ for several years I admit it took a little time to get used to the Diaspora* interface. Central is the ‘Stream’, a single column of posts of your contacts (followers in G+) and the hashtags (e.g #Linux) that you follow. Next is ‘My Activity’ which lists all posts that you liked, shared or commented on but also the posts that you wrote yourself. Lastly there is ‘Public activity’ that shows all public posts from the Diaspora* community. This also shows nudity or even porn but, as I noticed so far, this was always tagged with #nsfw which stands for ‘not suitable for work’. These #nsfw posts are not shown until the users clicks to open it. I think this is good solution to protect the user without censorship.

Conversations on Diaspora* are good and in-depth although it takes time to identify good contacts. After two weeks I have 29 contacts (on January 9 it was 50) of which half turns out to be what I consider good. Diaspora* provides the user with a good tool to ignore a contacts for instance if he or she turns out to be spammer. Diaspora* also allows for a private chat with an established contact which can be very handy.

Diaspora* doesn’t have the G+ equivalent of communities, a group of users sharing posts about a certain topic, and collections, a single users sharing posts about a single topic. These communities and collections can’t be mimicked by combined tags and aspects.

Conclusion

Diaspora* is, after Mastodon, the second biggest distributed social networks with the about 660.000 user accounts. Still a dwarf compared to Facebook but I’m not interested in the total number of users. I’m interested in the quality of the conversation and this is good, in fact it’s very good. People are mostly knowledgeable and helpful which guarantees meaningful chats. Just what I’m looking for.

I still prefer the G+ interface with multiple columns over the one column stream in Diaspora* because it saves a lot of scrolling however this seems like nitpicking. Overall the user interface of Diaspora* is straight forward and easy to work with.

The user has good control of the streams of information although I would have preferred the user to be able to combine tags and aspects. The reason for this is I want to be able to follow someone on certain topics instead of all his or her posts.

Diaspora* works surprisingly good on low-end machines. This is probably due to the minimal user interface. I consider this a big plus since I have a very old Thinkpad laptop that I use regularly.

Yes, my family and friends are not on Diaspora* but I don’t care about that in fact is a plus. I’d rather see them face to face anyway.

In conclusion Diaspora* starts to grow on me. I had a slow start with it but I’m gradually beginning to experience the strength of this well established and stable social network. I found Diaspora* very easy to use a plus that is not to be underestimated. The content that’s being shared is valuable and the conversations are excellent. For me that’s what counts when it comes to social networks.


EDIT: Diaspora* users can choose between a couple of Android apps. I choose Dandelior (which is the same app from the same developer as Dandelion) and I like it. Dandelior and Dandelion for Android can be downloaded from F-Droid.

EDIT: Diaspora* uses Markdown to format text making it an excellent choice for macro-blogging. Markdown appears to be more powerful than the editing features of G+. This and the single column stream are making Diaspora* an excellent choice for macro-blogging.