I wrote earlier about the Logitech Media Server (LMS), open source software that I’ve used to turn a Raspberry Pi into a music server for my Squeezebox devices. I’m using my Raspberry Pi based Logitech Media Server a couple of months and I’ve grown very fond of it. What started as an experiment now has become a device I’m starting to rely on. I guess that eventually I have to replace the USB-HDD that I connected to the Raspberry Pi with a better one. In the meantime however I do need to maintain the LMS. In this blogpost I’ll explain how I add and remove music files from the LMS and create a simple backup of your music files. Finally I provide a tip to debug problems with the Logitech Media Server. All software that I used for this project is free and open source.
Adding, changing and deleting music files
When I buy a new CD I want to add it to my LMS. All the ripping is done using Asunder, a low resource ripper for Linux. Asunder has a simple interface but it has many options can encode to many different formats. It can also tag the files using CDDB but I use MusicBrainz Picard because does a much better job when it comes to tagging (in addition MusicBrainz can organize your digital music library). The tagger completes the metadata on the music files which is very convenient when uploading the files to the LMS. A simple example is that album art is added to the file.
Now about moving the encoded files to the LMS. At first I unmounted the USB hard disk from the LMS, removed it and connected it to the laptop and copied the albums. For adding new albums this proved to be be a clumsy method and I quickly found myself looking for an alternative.
I decided to use FTP to transfer files over the network to the Raspberry Pi. FTP is a network protocol to transfer files between a client and a server. The software that I’m using is either FileZilla or gFTP. They have basically the same functionality but gFTP is not available for Windows while FileZilla is available for GNU/Linux, OSX and Windows. Working with both is easy enough.
Later I also used the scp command (Linux, OSX) in the terminal and simply copy the music files on my PC to the music folder on my Raspberry Pi powered LMS.
Read this if you (like me) run into problems with file ownership on your Raspberry Pi. In the past I couldn’t set the ownership for the USB hard disk on the Raspberry Pi. Only root was able to write to the disk. The reason is a bit technical and maybe confusing but I had used the Windows FAT filesystem for the USB hard disk and when I mounted it on my Linux laptop (Puppy Linux distribution), ownership of all files was changed by Puppy Linux to root. At this point it was impossible to change ownership and permissions with chmod and chown from the media server. To solve this problem I had to first unmount and mount the USB hard disk. To mount the hard disk use the following general command is used:
mount device mount-point -o uid=foo -o gid=fooor in my specific case
sudo umount ~/media/usb-driveand then mount
sudo mount /dev/sda1 ~/media/usb-drive -o uid=pi -o gid=piThis command sets the ownership of all files on the USB hard disk to pi instead of root enabling me to use FileZilla and gFTP to copy files from a remote PC to the Raspberry Pi.
Adding Podcasts to the server
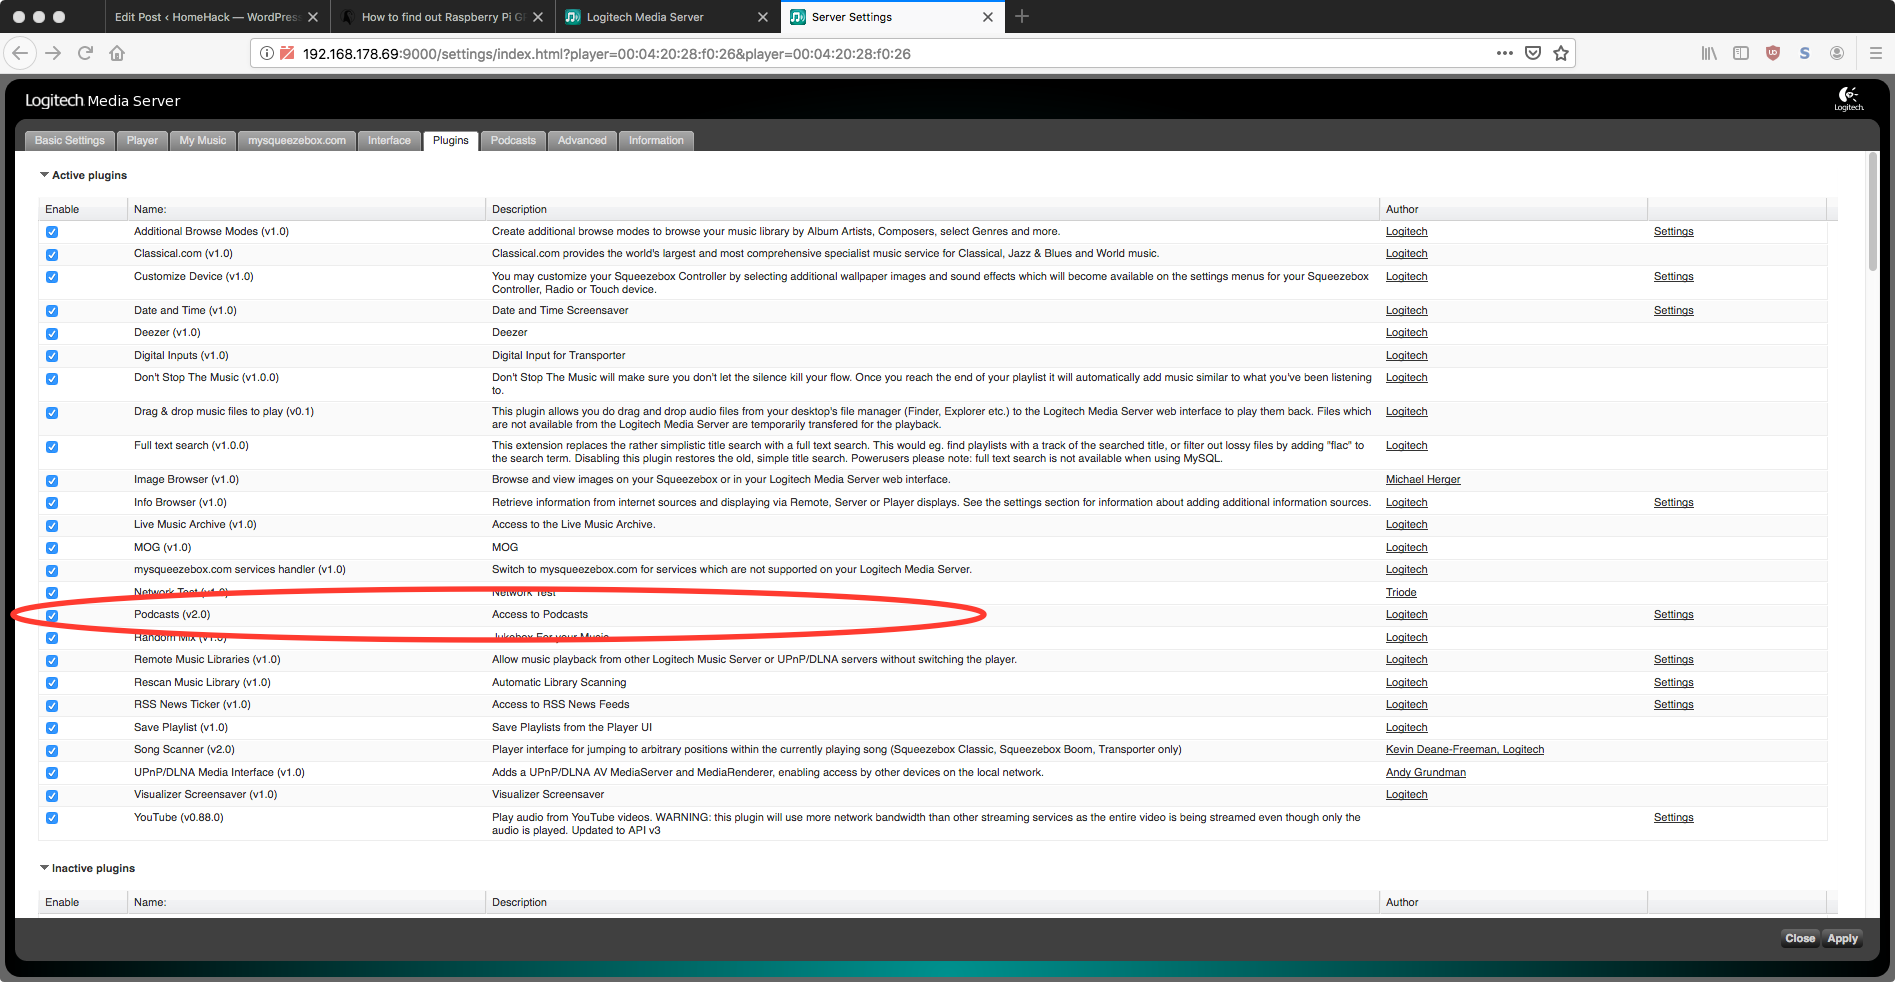
Podcasts can be easily added to the Logitech Media Server and there is no need to subscribe to a service. First the Podcasts app must be added to myApps on the Squeezebox player or players. Next to add podcasts to the list a plugin needs to be installed. To do this open the web interface in your browser and type:
<your_Raspberry_Pi_ip_address:9000> (in my case 192.168.178.69:9000)Choose Settings at the bottom right of the web browser and then choose the Plugins tab. Now enable the Podcasts (v2.0) plugin and reboot the Raspberry Pi for the changes to take effect. The Podcasts plugin is now active and can be entered through a new tab in the Settings menu. In this tab new feeds can be entered that will immediately be available on the Squeezebox players. To find a certain feed look for the rss feed of your favorite podcast and copy the link into ‘add a new feed’ in the podcast tab of the Settings menu mentioned above (e.g. http://feed.thisamericanlife.org/talpodcast for This American Life).
Creating a backup of the music collection
I invested a lot of time in ripping my CD collection so it would be a shame if I lost my music files due to a hard disk crash. I therefore use a very simple backup method, largely copied from the Raspberrypi.org website to ensure that my files are safe. First make sure that there’s enough harddisk space available with df -h. Next do:
tar -cvf backup.tar.gz ~/media/usb-driveThis creates a file ‘backup.tar.gz’ that contains files in /media/usb-drive, the mounting point of my USB drive and places it in the same map. Next I use (again) Filezilla to move the backup file to my desktop computer. Alternatively the ripped files on the PC they were ripped on can serve as a backup.
Debug problems with the Logitech Media Server
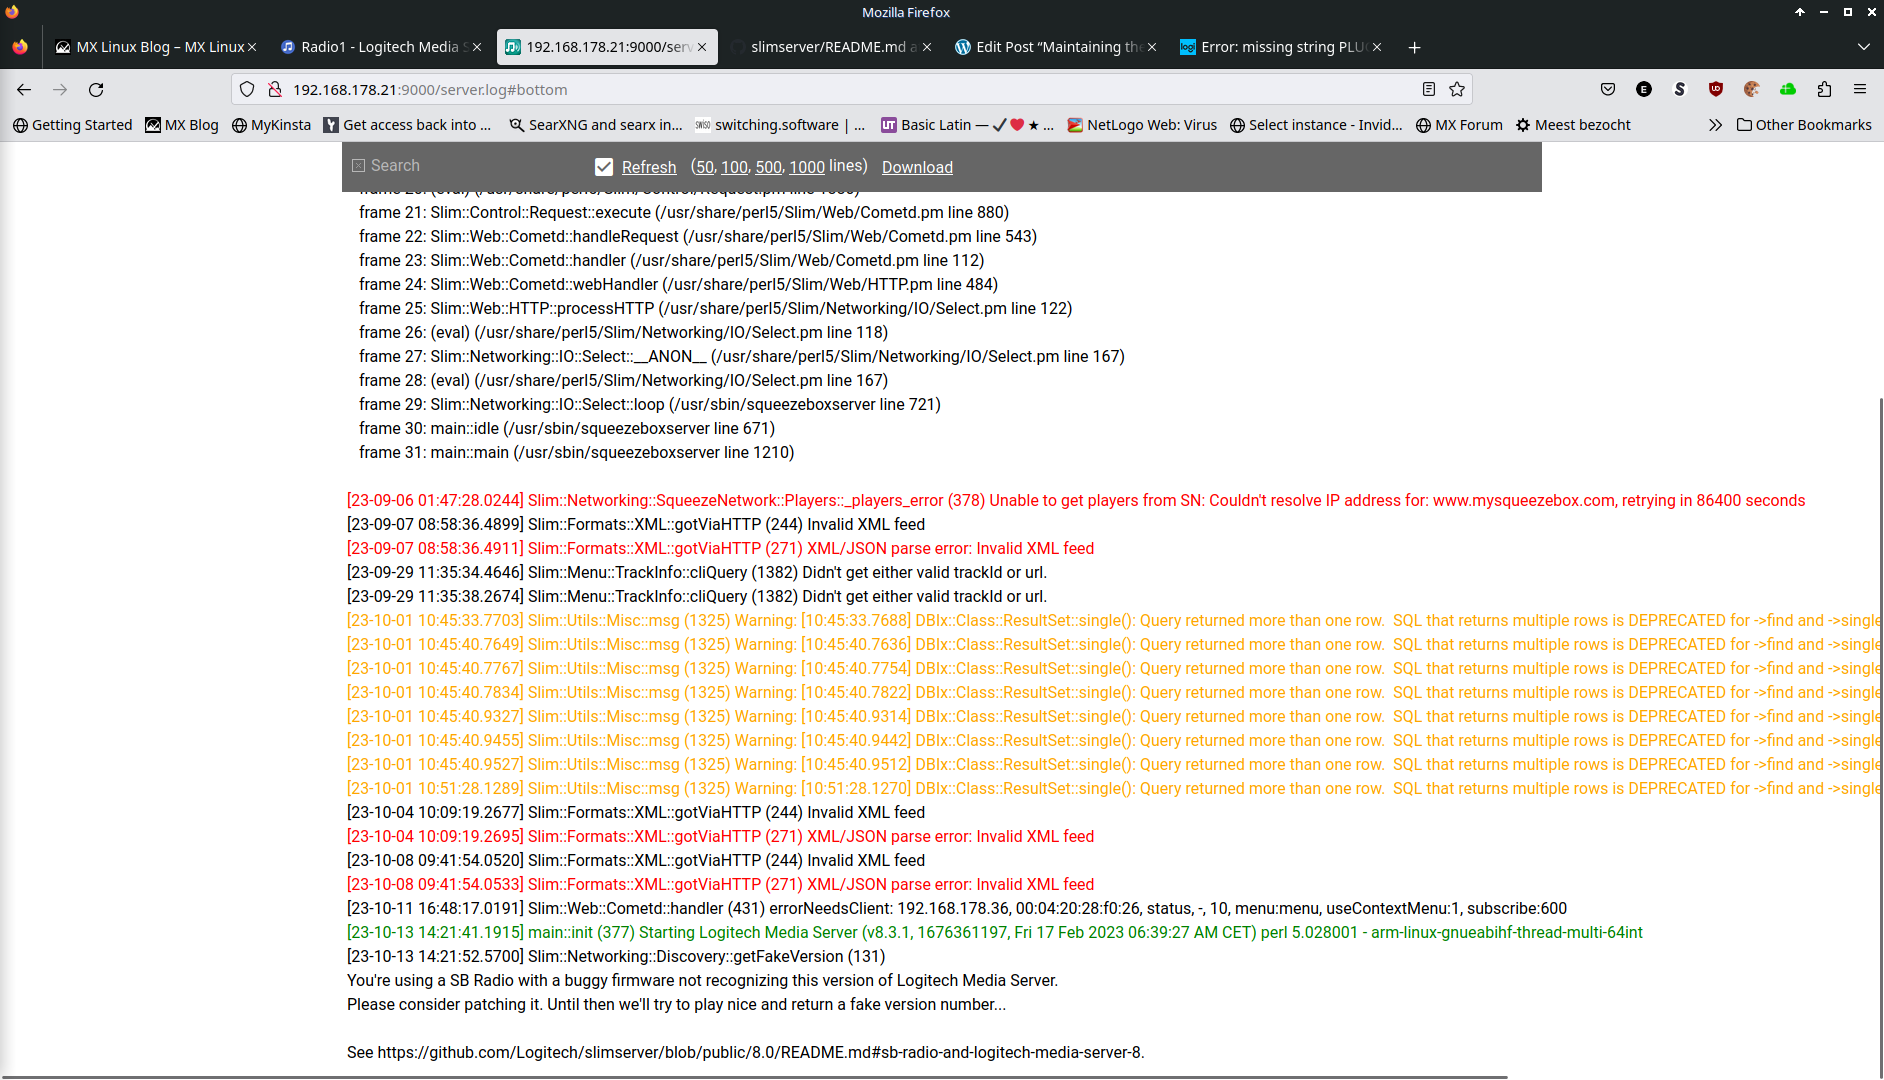
I didn’t encounter much problems with the LMS but if you do take a look into the log file of the server. This can be done opening a terminal on your PC and login into the Rasperry Pi with:
ssh pi@<your_network_ip_address_of_the_server>
cat /var/log/squeezeboxserver/server.log
The sudo ssh command prompts for the password of the Raspberry Pi. Now look for anything suspicious in the log, copy it and do an internet search with your preferred search engine. You’ll probably end up on https://forums.lyrion.org/. Chances are someone already encountered the same problem and it was solved with help of the community.
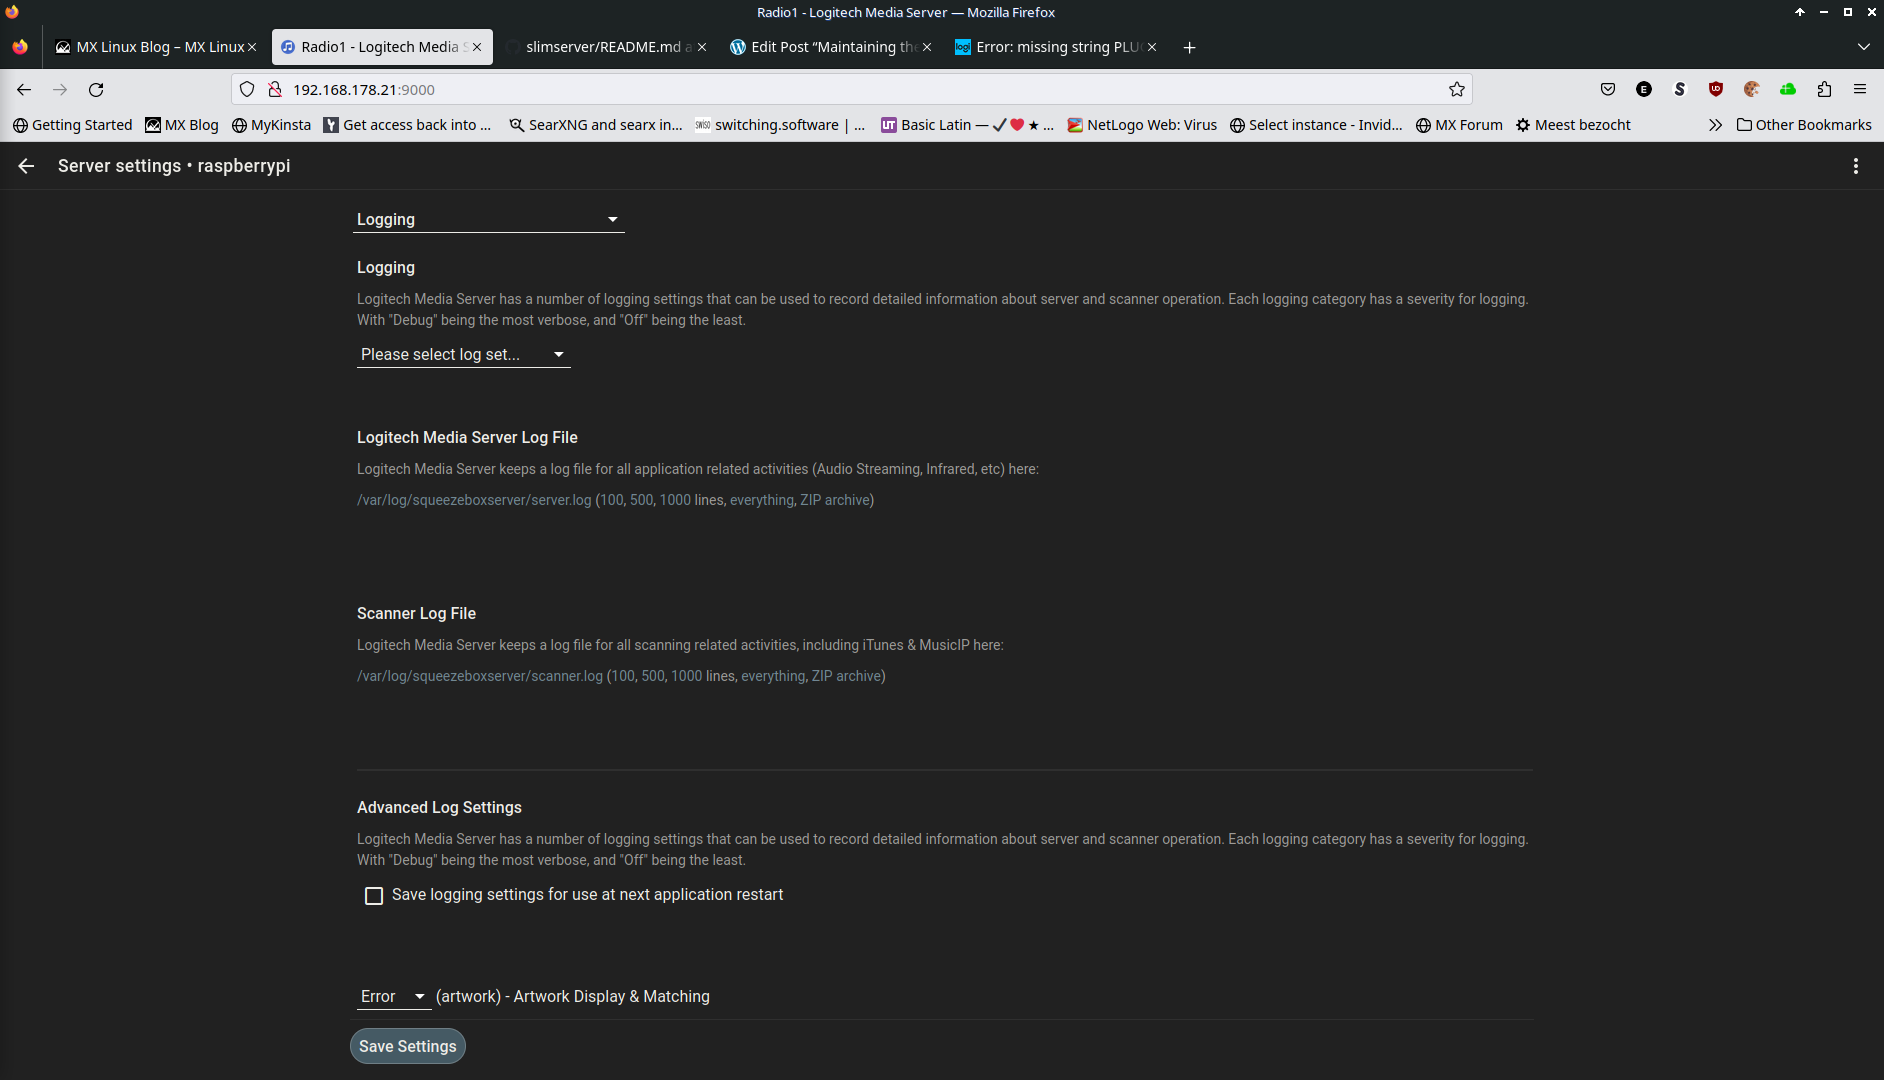
Alternatively, you can use the interface for the web browser. In the web interface choose Settings and then Server (CTRL-E), select Logging in the pull down menu and open the highlighted link to the server.log file.
Thanks for reading!