After mysqueezebox.com has shut down, Squeezebox audio player and its server software are still very much alive. Instead of relying on mysqueezebox one has to setup their own media server (which can be done on cheap low end hardware and isn’t as hard a it may seem). Previously the software was called Logitech Media Server […]
Category: Raspberry Pi
This article describes how to maintain a Squeezebox server (or Logitech Media Server). All software used for this project is free and open source.
Create your own Squeezebox server (aka Logitech Media Server, aka Slimserver) with a Raspberry Pi and a HDD in six steps.
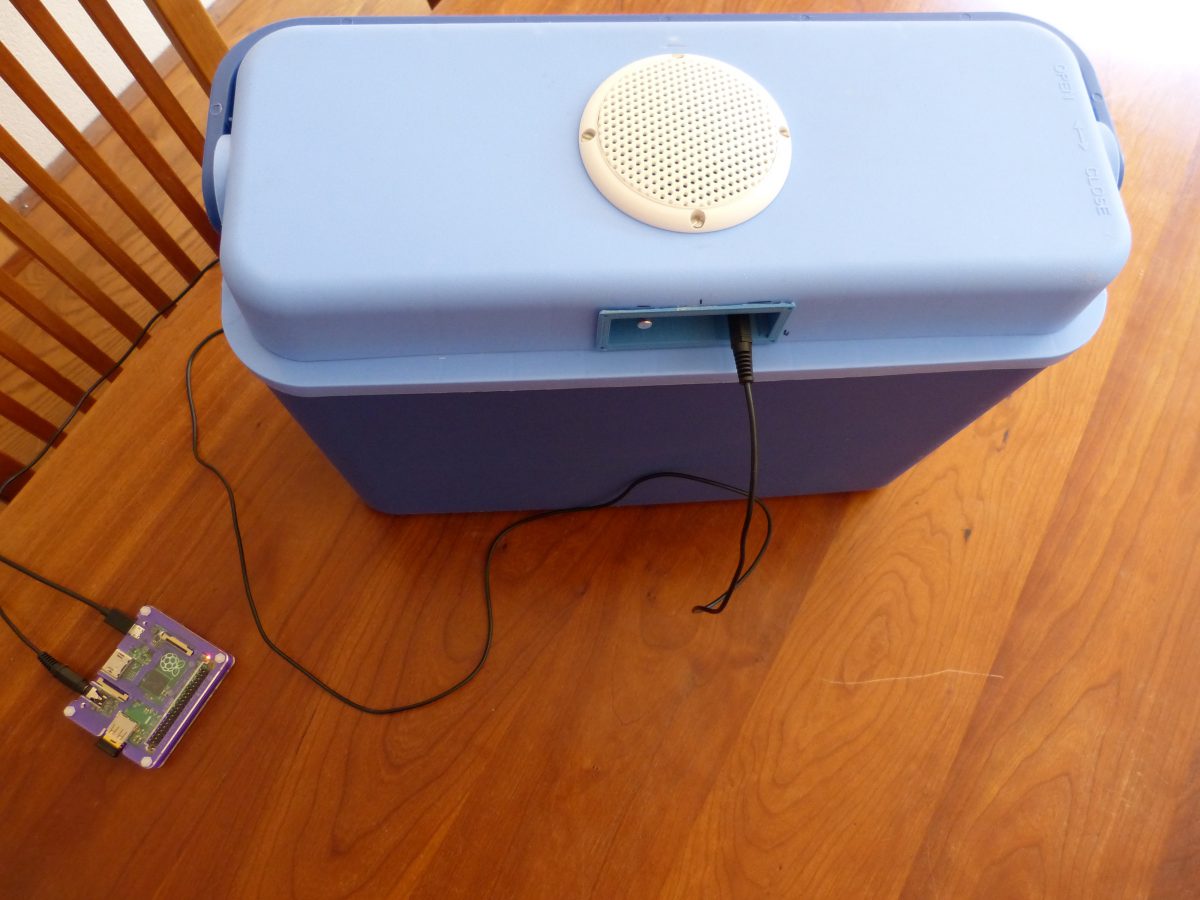
Using a Raspberry Pi and the program MPD to enhance my audio cooler
In the last two weeks I have built a Raspberry Pi surveillance camera. For the time being I used a crude housing made out of MDF. This was ok for testing purposes but now I wanted something more permanent. Something that I could attach to my window frame and that is able to pan and […]
Introduction Last week I wrote about the Raspberry Pi, the camera module and Motion acting as a surveillance camera. I’ve been testing my Raspberry Pi surveillance camera for a week now and the results are satisfying although there are also some problems. I think much of the succes of the camera comes down to finding […]
In this blog post I’ll describe how to build a simple security camera with a Raspberry Pi, a camera module and some MDF wood.