Desired features of the climbing board
The Covid-19 virus has locked us into our house most of the time. Luckily my son can keep exercising with this DIY device. Some time ago I built a climbing board for my son who is an avid climber and boulderer. He wanted to be able to train at home so I thought I’d build a wooden climbing board myself. I wanted the board to be cheap, versatile and build with materials that are easily obtainable. Lastly we have solid walls in our house so I wanted to build something that I could attach to these walls.
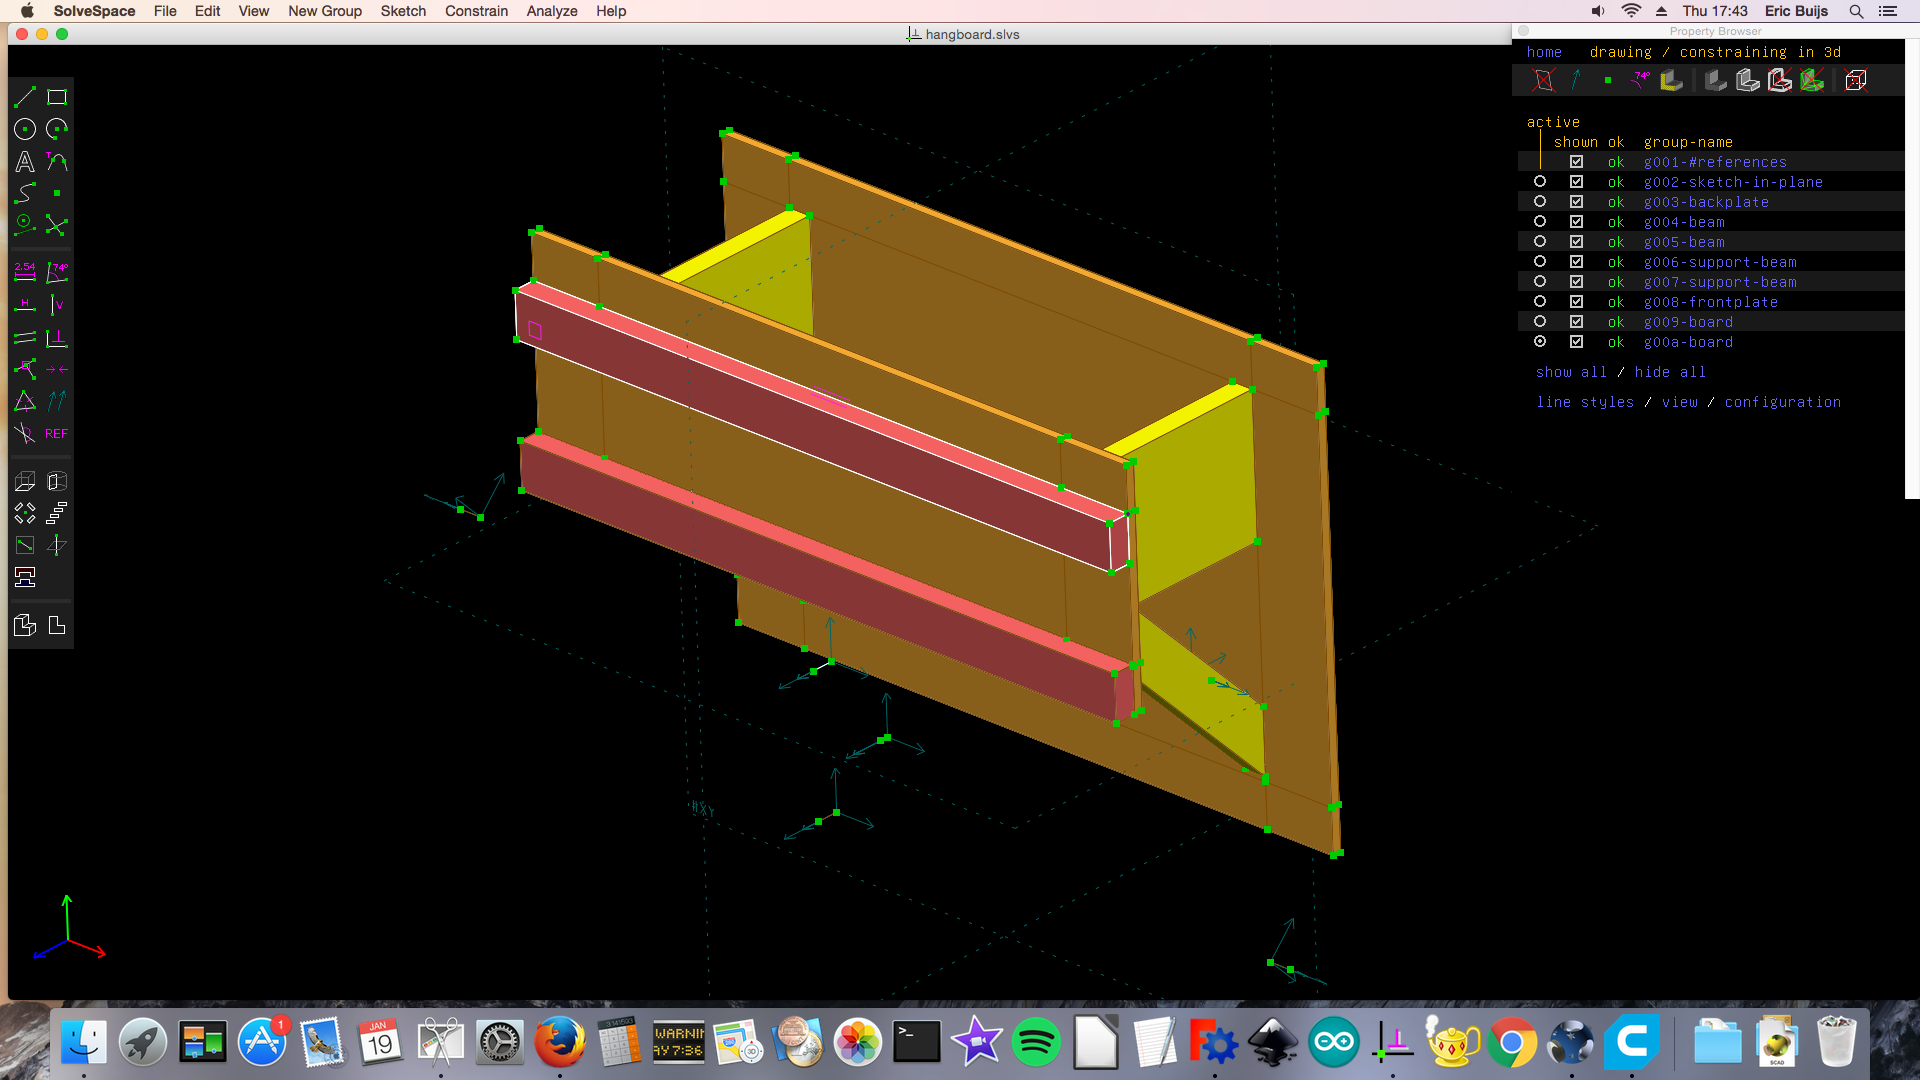
Design
I created a design in Solvespace, which is a great 3D CAD program. This design enables me to play with the dimensions before actually buying the materials and building the board.
Material needed
The backplate and front-plate are made of 12 mm (1/2″) plywood while the beams and support beams are made of 30mm (1 1/4″) scaffolding wood. The rails are of pine wood of various thickness, 1 1/4″ being the thickest and 18mm (3/4″) the thinnest. The support beams strengthen the construction considerably.
Here are the parts that are needed for this build:
- 1 x backplate 90 x 61 cm (3′ x 2′) plywood (12mm or 1/2″)
- 1 x frontplate 90 x 31 cm (3′ x 1′) plywood (12mm or 1/2″)
- 2 x beam 30 x 19 cm (12″x 7.5″) scaffolding wood (30mm or 1 1/4″)
- 2 x support beam 41.5 x 6.2 cm (14″ x 2″) scaffolding wood (30mm or 1 1/4″)
- 2 x rails 90 x 5 cm (3′ x 2″) pinewood of various thickness
- 8 x carriage bolts 6mm (1/2″)
- 8 x wingnut 6mm (1/2″)
- 4 x lag screws 7 x 60mm (5/16″ x 2.5″)
- 4 x wall plug fisher 10 mm (3/8″)
- 18 x twin-fast screw 4.5 x 40mm (3/16″ x 1 1/2″)
How to make it
Building the board is straight forward. First I’d cut the plywood to the plates with the size indicated above. Next I’d cut the scaffolding wood for the beams. I used a simple Dremel DSM20 for this but any circular saw will do. Lastly I’d cut the pinewood beams. I used a router to make a radius on one side of the beams. This radius ensures that the beams are easier on the hands.
With all the pieces cut, I drilled the holes in the backplate, frontplate and rails. Next I assembled all the parts. Starting with the backplate and the beams. I used a 3mm drill before fastening the beams and the plywood with the twinfast screws. This avoids that the wood splits open. The beam and supportbeam were fastened with a single twinfast screw. Next I fastened the frontplate to the beams again using twinfast screws. To finish the hangboard I fastened the beams to the frontplate using the carriage bolts and wingnuts. Lastly I applied a transparent oil to the hangboard to provide protection It’s more pleasing to look at too.
Fastening the hangboard to the wall may differ from situation to situation but since we have concrete walls I used four large wall plugs (Fisher brand). The board was then attached to the wall using the lag screws with washers to protect the wood.


Added features
The hangboard proves to be strong enough for my son (he weights approximately 57kg). I tried it myself (I’m 80kg) but my fingers just aren’t strong enough to keep my weight. Nevertheless I’m confident that the construction is more than enough to keep a weight well over 65kg. As for aesthetics the board looks pretty good (for a hangboard that is).
Thanks for reading!