Introduction
The last couple of weeks I worked on a homemade voice modulator that is easy and cheap to built. First I’d like to mimic the Darth Vader voice changer, but with the press of a button it can be changed to robot or helium kind of voice effects. Last week I’ve steadily continued my work. The project has two main parts, the electronics and the case.
Electronic circuit
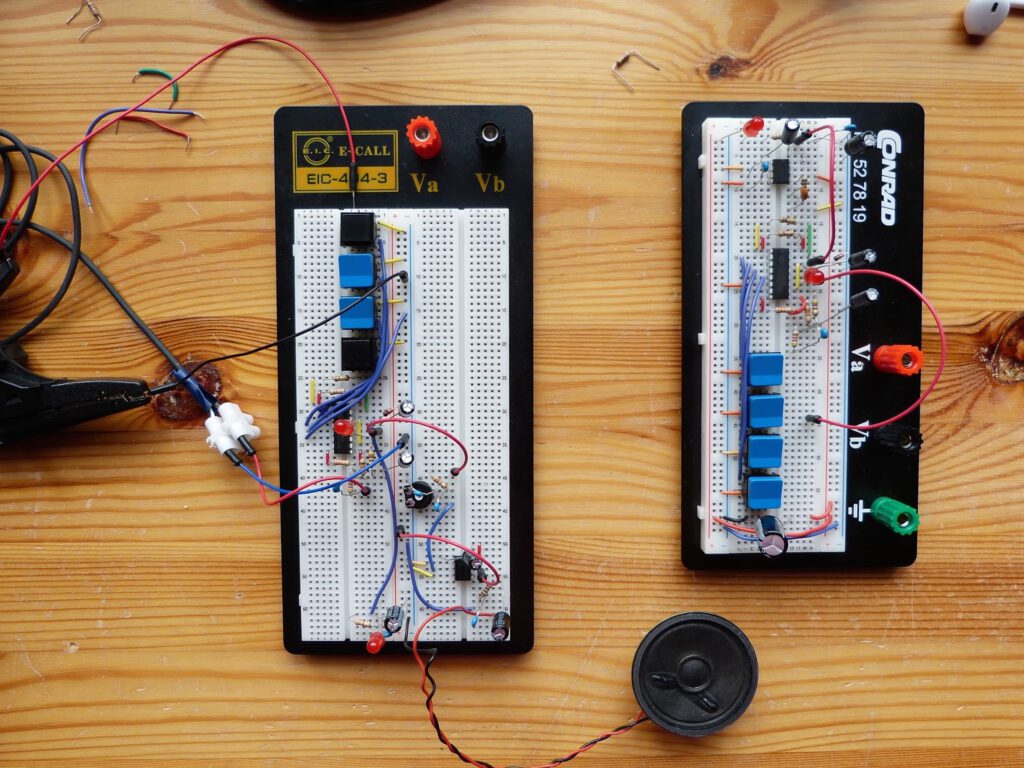
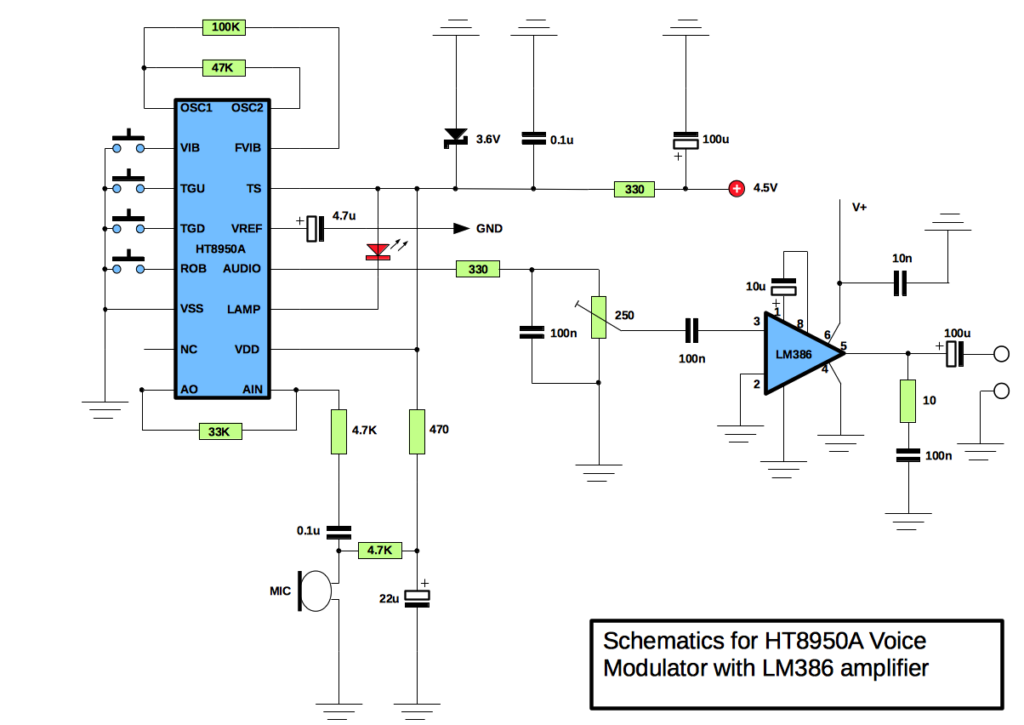
For the project I choose the HT8950A voice modulator from Holtek as the heart of the circuit. It is cheap, versatile and easy to work with. I previously had the voice modulator working. I only had to amplify the signal which seemed simple enough. Well, that turned out to be a bit more troublesome than expected. After connecting the LM386 to the circuit and powering it up an annoying hiss was introduced. After some experimenting I figured that the breadboard was to blame and decided to copy the circuit to another breadboard. Although on the new breadboard the hiss appeared somewhat reduced but it was still at an unacceptable level. Even when I removed the input signal from the LM386 the hiss continued. I connected the HT8950A with a audio-jack to an external amp. I wanted to make sure that the hiss was coming from the LM386. With the external amp the hiss was gone. The fact that I had hiss without an input signal indicated that the supplied voltage wasn’t clean. To clean it up I placed a small capacitor (10nF) from pin 6 (V+) to ground and voila the hiss was gone (see schematics below). It took me some time but I’m almost ready to finish this circuit and solder it to perfboard.
Printing the case.
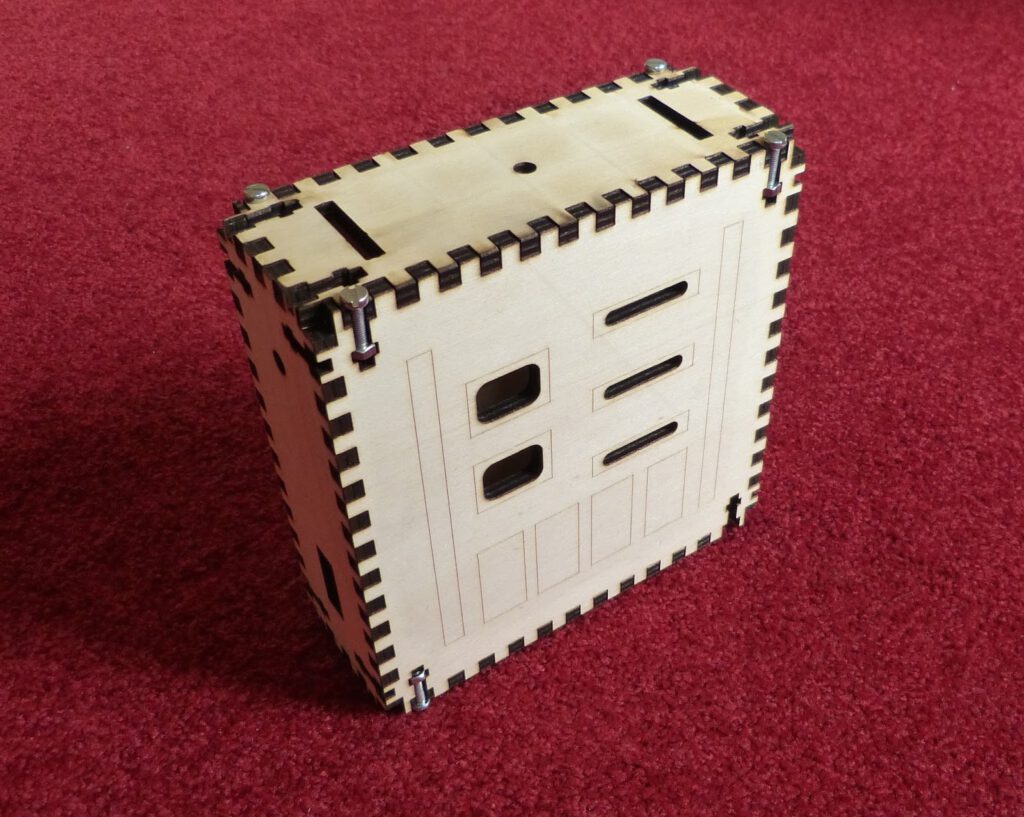
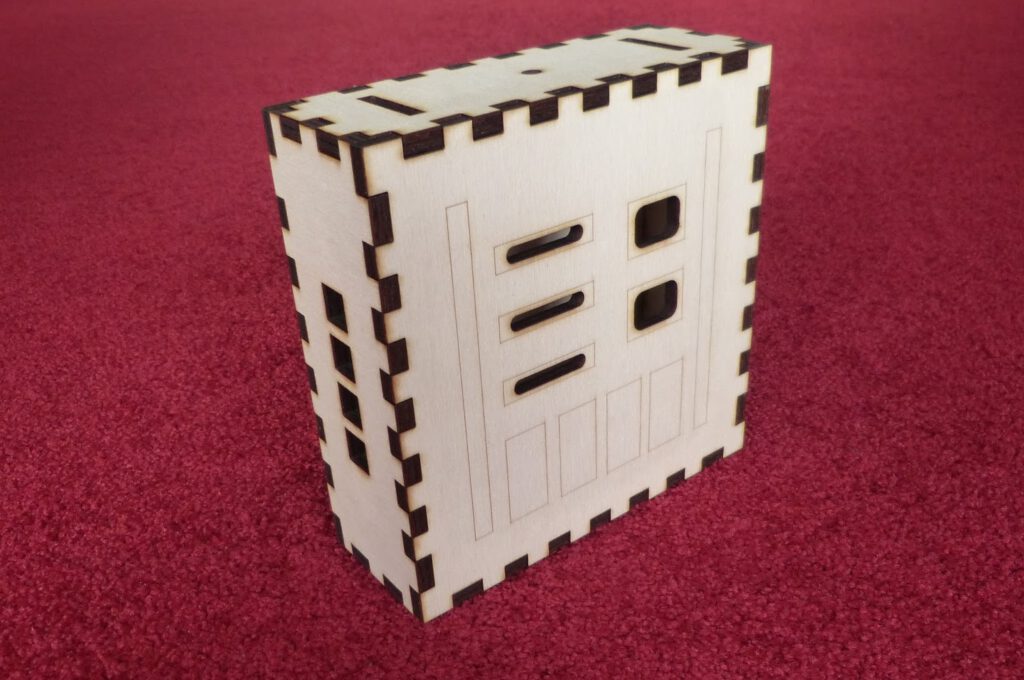
I decided previously to make a T-slot plywood case for the Voice Changer but I’m not satisfied with the result. First I made a beginners mistake with the tab width. It was chosen poorly resulting in fragile edges of the case. Also I discovered that a T-slot case is not the best choice for this project. The case needs to be sturdy and the T-slot isn’t. I’m afraid it will fall apart when in use. Therefore I’ll made a regular finger joint that will be glued together. This new case was much better. Gone are the fragile edges and I’m confident that glued together it will be very sturdy.
Here are the links to all blog posts I wrote about this chest box:
- Darth Vader voice changer 2.0 (HT8950A) part 1, demonstrates the voice changer on the breadboard: https://homehack.nl/darth-vader-voice-changer-2-0-ht8950a/
- Darth Vader voice changer 2.0 part 2: designing the case: https://homehack.nl/darth-vader-voice-changer-2-0-designing-the-case/
- Homemade Darth Vader Voice Changer 2.0 (work in progress) part 3: https://homehack.nl/homemade-darth-vader-voice-changer-2-0-work-in-progress/
- The Darth Vader chest box part 4: almost finished: https://homehack.nl/the-darth-vader-chest-box-is-almost-finished
- Darth Vader voice changer 2.0 part 5: finished: https://homehack.nl/darth-vader-chest-box-finished/